25 Creative Halloween Ideas You Can Pull Off on a Budget
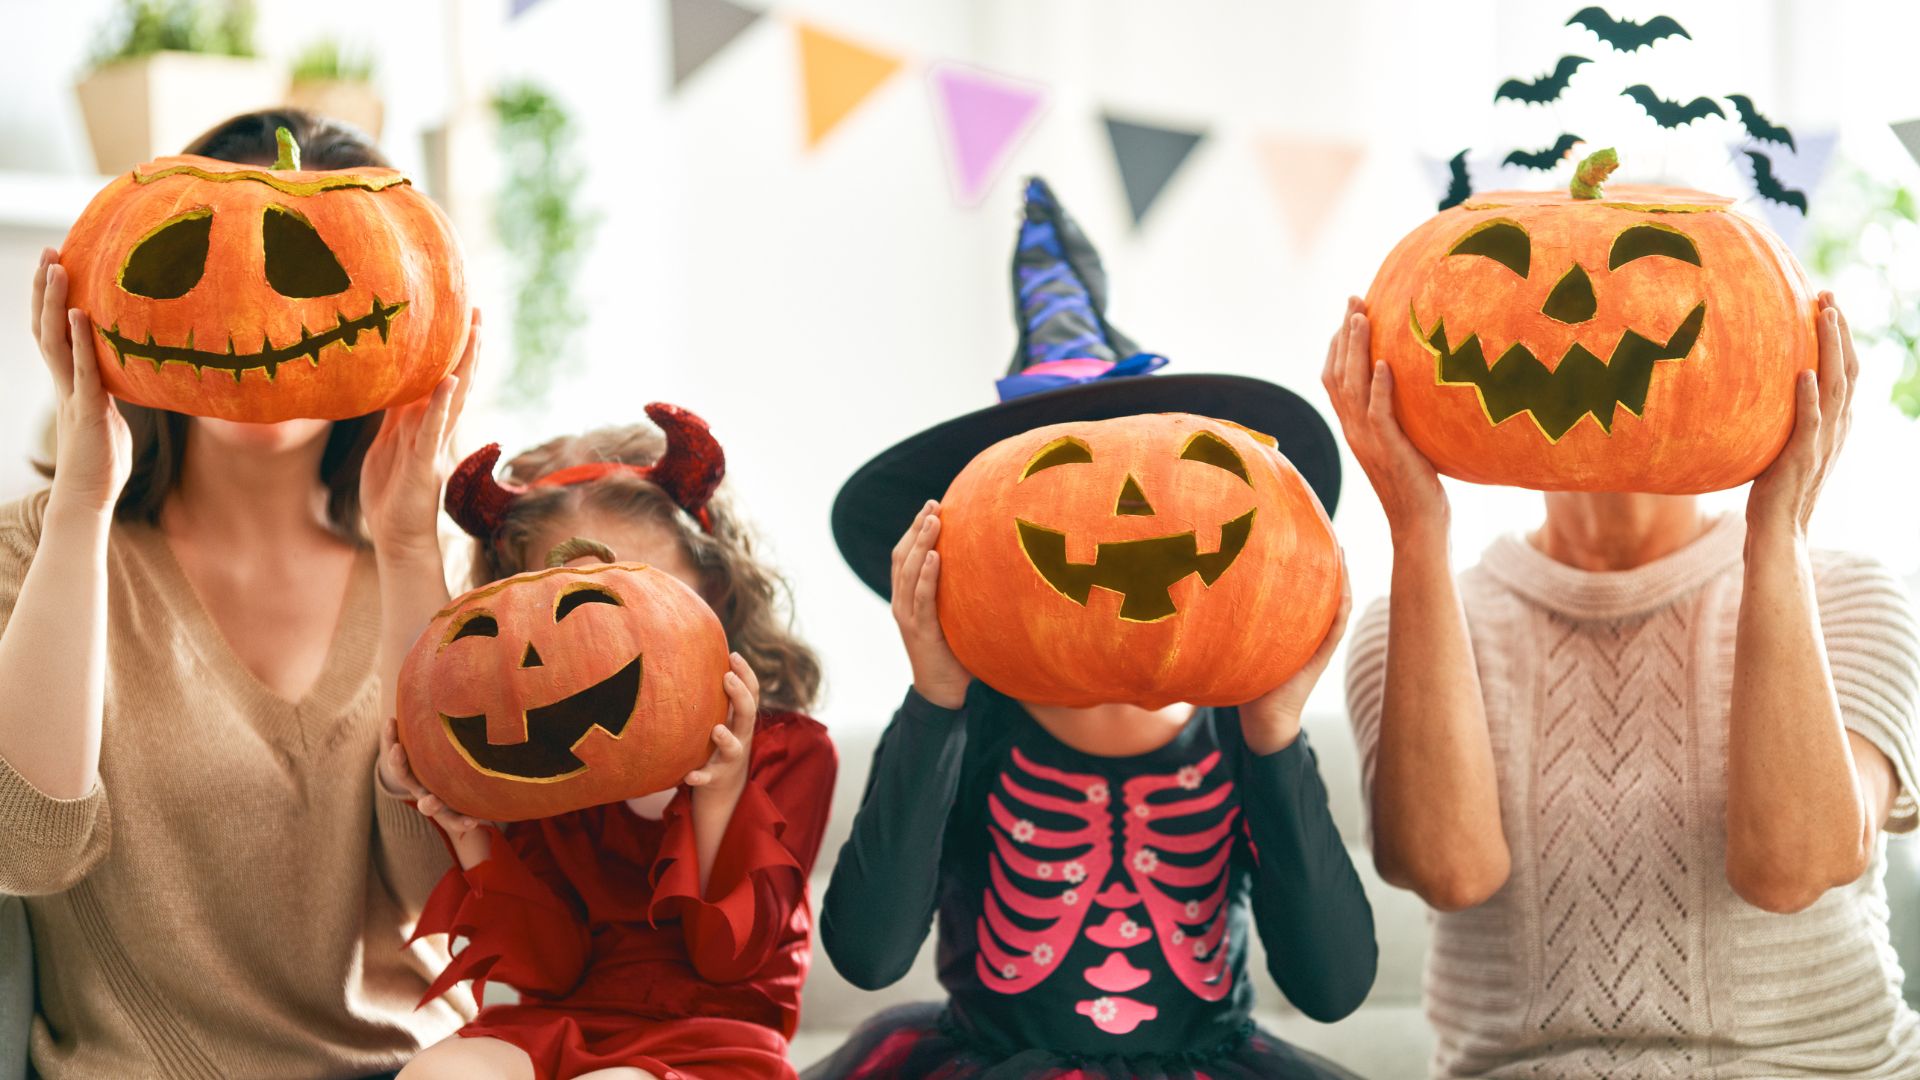
Halloween doesn’t have to be expensive to be spooky and fun. With a little creativity, it’s possible to throw a memorable Halloween party, decorate the house, or put together an amazing costume without spending a fortune. Here are 25 budget-friendly Halloween ideas to inspire the festivities.
1. DIY Ghost Garland
Creating your own ghost garland is a fun, inexpensive way to add a spooky vibe to your Halloween décor, and it’s perfect for all ages. Start by gathering your materials—you’ll need white paper or cheesecloth, scissors, a black marker or googly eyes, string or twine, and glue (optional). If you’re using white paper, fold each sheet in half and draw a simple ghost shape on one side. Make sure to include rounded tops for the ghost heads and flowing sides that resemble the bottom of a sheet. Carefully cut along your outlines, ensuring each ghost has a clean shape. For cheesecloth, cut small sections into ghost-like patterns, allowing the edges to fray for an authentic, ethereal look.
Next, it`s time to bring your ghosts to life! Use the black marker to draw expressive faces on the paper ghosts. For varied expressions, experiment with different eye sizes, smiling mouths, or even spooky frowns. If you’re using googly eyes instead, simply attach them with a dab of glue for a whimsical touch. For the cheesecloth ghosts, use a small cotton ball or balled-up tissue as a "head." Place it in the middle of the fabric, pull the edges tightly around it, and tie it off at the neck with thread or string. Use a marker to add simple eyes, or cut tiny black paper circles and stick them on.
Once your ghosts are complete, arrange them along a piece of string or twine. If you`re using paper ghosts, punch small holes at the tops of their heads and thread the string through. For cheesecloth ghosts, tie or glue the thread to the back of each head. Space them evenly along the length of the garland, leaving extra string on the ends for hanging. Finally, find a great spot to display your ghost garland, such as above a doorway, across a mantel, or along a staircase railing. It’s a festive and personalized decoration that sets the perfect eerie tone for Halloween!
2. Toilet Paper Mummy Costume
Transforming yourself or a friend into a convincing mummy has never been so simple—or affordable! To get started, all you need is a few rolls of toilet paper or white fabric strips, and optionally, some tape or safety pins for extra security. Start by deciding the base layer of clothing. A single-color outfit, like a white or beige long-sleeve shirt and pants, works best and creates the illusion of bandages underneath the wrappings.
To begin wrapping, select one end of the toilet paper roll and carefully anchor it at a wrist or ankle. If you’re using fabric strips, you can secure the starting point with a small safety pin or tuck an end securely into itself. Gently wind the toilet paper or fabric around the limb, moving upward and keeping the material slightly overlapped. For an authentic, weathered look, twist and crinkle the material as you go, and leave a few loose ends hanging here and there.
Work your way across the body—move from the arms to the torso, and finally the legs, adjusting the toilet paper or fabric to ensure even coverage. Be sure to leave gaps around joints to allow for movement and flexibility. An important detail is to wrap the neck and head (if desired) carefully, leaving enough room for breathing and seeing. You can use smaller, finer strips for these areas to make the design more intricate.
Finally, reinforce the costume by gently tucking loose ends into layers of the wrapping or securing them with small pieces of tape or pins. To elevate the spooky effect, lightly dust the wrappings with gray or brown eyeshadow to mimic ancient, dusty bandages. If you`d like, carry an added prop like a plastic spider or hold your arms stiffly in classic mummy fashion. This costume is perfect for last-minute preparations and is sure to bring laughs and admiration for its creative simplicity!
3. Pumpkin Carving Alternatives
If real pumpkins are too pricey or difficult to find, don`t worry—there are plenty of creative and sustainable alternatives to traditional pumpkin carving. One excellent option is to use foam pumpkins, often available at craft stores. These lightweight, artificial pumpkins are designed specifically for carving or decorating. They offer several benefits, including being reusable for future Halloween celebrations, unlike real pumpkins which eventually decay.
Foam pumpkins also tend to be easier to carve, as they don`t have the messy pulp or seeds found inside real pumpkins. To carve a foam pumpkin, you can use standard carving tools or even basic craft knives. Some pre-designed stencils might work great on foam surfaces, helping you create intricate, professional-looking designs without much hassle. They can be painted, adorned with glitter, or embellished with additional decorations for a personal touch.
If carving isn`t your style, you can opt for painting small gourds or pumpkins. Painting is a versatile and family-friendly activity that opens up endless design possibilities. From spooky faces and Halloween-themed designs to intricate patterns and fall aesthetics, painting allows you to customize your decor to match any theme. Acrylic paints work particularly well, as they adhere easily to the smooth, firm surface of gourds and foam pumpkins. You can accessorize painted gourds with ribbons, rhinestones, or dried flowers to elevate the look. Plus, painted gourds can last all season long, making them a practical and budget-friendly decorative option that can easily be repurposed for Thanksgiving decor.
4. Spooky Shadow Silhouettes
Creating spooky shadow silhouettes is an affordable and straightforward way to add a touch of eeriness to your home`s Halloween setup. Start by gathering black paper or cardstock, scissors, and some tape. Using a pencil or chalk, draw the outlines of classic Halloween shapes such as bats, witches on broomsticks, ghosts, spiders, or monsters. Stencils can be a helpful guide if freehand drawing seems challenging. After outlining your shapes, carefully cut them out with sharp scissors. These silhouettes don`t have to be perfect—their impact comes from their dark coloration and placement, not precision.
Once you’ve crafted a collection of shapes, tape each silhouette to your windows. For the best effect, position the cutouts so that they overlap slightly with the edges of the glass, creating dynamic and unique shadows. To make the arrangement even more striking, consider layering several shapes together or varying their sizes to foster depth in your setup. At night, the real magic happens—turn on some interior lights, and the silhouettes will cast dramatic shadows that are visible from outside your home. This gives your house a creepy and mysterious appearance, perfect for Halloween night.
For a finishing touch, you can enhance the ambiance by using colored or flickering lights indoors to give your shadow effects additional mood. For example, orange string lights or dimmed LEDs create an ominous glow, while green or purple lighting adds a ghoulish twist. Combining shadow silhouettes with minimal effort and creative lighting can transform your space into a festive and eerie Halloween masterpiece.
5. Thrift Store Costume Finds
Creating a unique Halloween costume doesn`t have to break the bank, and thrift stores are prime locations for finding hidden treasures. These stores often stock a wide variety of vintage clothing, props, and accessories that can serve as the foundation for your costume or add the finishing touch to your Halloween look. From old-fashioned dresses and suits to quirky hats and scarves, the options are practically limitless. For instance, an oversized blazer paired with a belt could be turned into a 1980s-inspired outfit, or a frilly blouse might complete the look for a Victorian-era character.
Thrift stores are also an excellent resource for themed costumes, such as pirates, witches, or retro Hollywood stars. Digging through the aisles can uncover unexpected gems like leather jackets, faux fur coats, or unique costume jewelry to elevate your ensemble. Plus, many shops carry small props like plastic swords, vintage purses, or even wigs. A little creativity goes a long way—mix and match pieces to craft one-of-a-kind costumes that wouldn’t be possible with prepackaged kits.
For families, thrift shopping offers an affordable way to dress up both kids and adults without overspending. Children’s sections often hide treasures like superhero shirts or princess dresses, while adults might find hidden gems like retro sports uniforms or overalls. Thrift stores are also a great choice for DIY enthusiasts, allowing you to repurpose and customize items. For example, you can embellish a plain dress with fake spiderweb trim or distress old jeans to create a zombie look. The beauty of thrifting lies in its affordability, sustainability, and endless possibilities for creativity.
6. Glow-in-the-Dark Decor
Transforming your home into a haunted haven is simple with glow-in-the-dark decorations. Affordable and versatile, glow sticks, glow-in-the-dark paint, and luminous props can add a spectral glow to your Halloween setup. These glowing elements are easy to incorporate throughout your decorations—place glow sticks in pumpkins, vases, or jars for a ghostly radiance, or use glow-in-the-dark tape to outline spooky shapes or create eerie pathways leading to your door.
For crafting enthusiasts, glow-in-the-dark paint can bring your imagination to life. Use it on old jars to create haunting lanterns, or paint spiderwebs, skeletons, or other creepy designs on walls, cardboard cutouts, or fabric backdrops. For an interactive twist, try painting glowing footprints or handprints on sidewalks or walls to give the illusion of wandering spirits. Glow-in-the-dark effects stand out in the evening, making them ideal for adding depth to your haunted ambiance.
If you`re looking for higher quality or professional-grade decorations, stores like Spirit Halloween offer an extensive array of glow-in-the-dark props and costumes. You can find items like glowing skeletons, light-up wall hangings, and even costumes equipped with built-in lighting effects to ensure you or your home stands out on Halloween night. To maintain your budget while shopping at Spirit Halloween, consider using Spirit Halloween Coupon Codes to reduce costs. These discounts allow you to access premium decorations and accessories without overspending, helping you achieve the ideal balance of creativity and affordability.
By mixing DIY glow-in-the-dark projects with store-bought decorations, you can create an immersive and frightfully fun Halloween atmosphere. Glow-in-the-dark elements serve as both economical and visually memorable additions that delight trick-or-treaters and guests alike. Experiment with these glowing items to make your Halloween night an unforgettable experience.
7. DIY Candy Bags
Getting creative with your candy bags is an excellent way to save money while adding a personal touch to your Halloween festivities. Instead of purchasing pre-designed, expensive treat bags, opt for plain paper bags that can easily be customized at home. Start by choosing simple brown or white paper bags, which are both affordable and versatile. Gather a selection of Halloween-themed stickers, stamps, markers, or paints to decorate them.
Draw classic Halloween motifs like jack-o’-lanterns, bats, ghosts, or witches’ hats to give each bag a festive flair. For a more interactive element, you can include children in the crafting process, allowing them to add their unique designs to the treat bags. To take it up a notch, consider writing spooky messages or the names of your trick-or-treaters directly on the bags, making them feel extra special.
If you`re feeling adventurous, glue on small accessories like googly eyes or use glow-in-the-dark paints for an added Halloween surprise. Not only does this save money, but it also creates a memorable and personalized element to your Halloween celebration.
8. Creepy Crawly Ice Cubes
Adding an unexpected touch to your party drinks can create an unforgettable Halloween experience, and creepy crawly ice cubes are perfect for this. Start by finding small, inexpensive plastic spiders, bugs, or other creepy critters that are safe to freeze. Be sure to clean and sanitize them thoroughly before use. Next, fill your ice cube tray with water, milk, or even fruit juice for colored cubes, and drop a single plastic creature into each section of the tray.
Once frozen, these eerie ice cubes can be added to drinks for a spooky surprise. Imagine the delight—or fright—of your guests as a plastic spider or beetle emerges in their beverages as the ice melts! These ice cubes can also be a conversation starter at your party and tie in seamlessly with any creepy or haunted theme. For an extra eerie twist, use black or green food coloring in your water before freezing to enhance the Halloween vibes. This is a simple yet effective way to elevate your party`s atmosphere without the need for expensive decorations.
9. Haunted House Lighting
The right lighting can transform any house into a spooky scene, and creating a haunted ambiance doesn’t have to break the bank. A simple, cost-effective way to achieve this is by using red or green LED light bulbs, which can instantly bathe any room in an eerie glow. Replace standard light bulbs in your lamps, porch lights, or overhead fixtures with these colored LED versions. Red lighting creates a sinister, blood-like atmosphere, perfect for a vampire lair or haunted dungeon.
Meanwhile, green lighting has an ominous, otherworldly tone that works well for witchy or ghostly themes. These bulbs are relatively inexpensive, energy-efficient, and widely available at home improvement stores. To amplify the effect, point the lights toward walls, ceilings, or specific decorations in your room to cast dramatic shadows, giving the space an even spookier appearance. Combine the colored lighting with other elements like fog machines or window silhouettes for a fully immersive haunted house look. The use of LED lights is not only budget-friendly but also ensures a high-impact result that will leave your guests in awe.
10. Zombie Makeup with Household Items
Transforming into a convincing zombie doesn’t require a trip to the costume store. You can create realistic zombie makeup using everyday household items and a bit of creativity. To make convincing fake blood, combine corn syrup with a few drops of red food coloring and a tiny drop of blue food coloring to add depth to the shade. Thickening the mixture with flour can give it a coagulated, chunky consistency, making it look more lifelike. For creating gruesome wounds or scars, use tissue paper and glue.
Layer torn tissue onto your skin using a thin layer of school glue or eyelash adhesive, building up the texture until you create a jagged, uneven effect. Once it’s dried, add color to the tissue using makeup, face paints, or even lipstick in shades of red, purple, and black to mimic the appearance of bruised or torn flesh.
Blend these layers with your natural skin tone to create a seamless and horrifying effect. Finishing touches, like smudging dark eye shadows around your eyes and cheeks to give a sunken, lifeless look, can truly bring the undead aesthetic to life. Best of all, this hacks costs next to nothing and relies on items that are likely already in your kitchen or bathroom.
11. DIY Tombstones
Bringing a graveyard vibe to your Halloween setup is easier than you think with DIY tombstones. Begin with a sturdy base material like cardboard or foam board, which can be easily shaped with scissors or a utility knife. Draw and cut your desired shapes – classic rectangular slabs with curved tops are a great starting point – and ensure they can stand upright by anchoring them in some way, such as by attaching stakes or mounting them against solid objects. Painting the tombstones is where creativity shines. A base of gray acrylic paint can be sponged or brushed on for a stone look, adding texture with lighter tones to mimic weathering and cracks for added realism.
Use black paint or markers to inscribe humorous or eerie epitaphs, such as “R.I.P” or personalized messages like “Here Lies Fred, Who Stayed Up Late and is Now in Bed.” For an aged appearance, lightly mist the surface with watered-down black paint or brown tones to create a mossy, dirt-covered look. Arrange the tombstones in your yard or indoors with artificial cobwebs, fake skeletons, or LED candles for a graveyard that balances spooky and creative. With basic materials and some effort, you’ll have a memorable Halloween centerpiece.
12. Scary Sound Effects Playlist
Sound is one of the most powerful tools for creating an unsettling Halloween atmosphere, and compiling a playlist of scary sound effects is an essential step. Start with free horror soundtracks available online or browse Halloween-themed playlists on YouTube, which often include creepy noises such as howling winds, ghostly whispers, or distant, ominous footsteps.
For an even more immersive experience, consider combining these free resources with high-quality Halloween audio props. Retailers like Spirit Halloween offer excellent options like howling werewolves, cackling witches, or chains rattling in the night. To elevate your soundscape further, use portable speakers or Bluetooth-enabled surround sound systems to distribute the effects across different areas of your home or yard. This layering of sound can create a dynamic and spine-chilling experience as your guests move through your setup.
For savvy shoppers, Spirit Halloween coupons can be found on websites like CouponGot, allowing you to invest in premium-quality props at a discounted rate. Whether you stick to free resources or go for professional sound effects, the right sounds will amplify the fear factor and make your Halloween celebration truly unforgettable.
13. Black Cat Décor
Black cats have long been associated with Halloween, folklore, and all things mysterious, making them a perfect addition to your spooky décor. To incorporate black cat decorations into your home, start by deciding on the materials you’d like to use. For a simple and cost-effective option, you can cut out black cat shapes from construction paper or cardstock. Using a stencil or hand-drawn template, trace sleek black cat silhouettes in various poses—arching their backs, sitting quietly, or prowling stealthily. Once cut, these figures can be used to adorn walls, windows, and doors to give your space a hauntingly festive vibe.
For a more elaborate approach, consider painting wooden or cardboard cutouts of black cats. You can find pre-made cutouts at craft stores or create your own using plywood or thick cardboard. Use black acrylic or spray paint to cover the base, and add small but effective details like glowing yellow or green eyes, noses, and whiskers with paint or adhesive materials. Many choose to accentuate these decorations with glitter, reflective materials, or even small LED lights to make them pop in dim lighting.
To enhance your black cat-themed setups, place life-sized or miniature cat figurines on shelves, tables, or in corners. Adding accessories like collars, bows, or small witch hats to the figures offers a whimsical touch. Position these black cat decorations to peek out mysteriously from unexpected places—beneath a staircase, on a windowsill, or even surrounded by flickering candles. Combine them with other Halloween elements like pumpkins, cobwebs, and eerie lighting for a cohesive and enchanting design throughout your home.
14. Spiderweb Everywhere
Nothing says Halloween like the timeless addition of spiderwebs sprawled across the nooks and crannies of your home. Creating the perfect eerie ambiance with spiderwebs starts with obtaining stretchable cotton webs or cheesecloth, both available at craft stores and online. Begin by identifying the focal points of your décor—these could be furniture pieces, railings, windows, doorways, or even outdoor shrubs and trees.
To create realistic spiderwebs indoors, take small sections of the stretchable material and pull them apart gently but firmly to achieve that delicate, gossamer texture. This step is vital to mimic the organic feel of real spiderwebs. Wrap the stretched material around chair backs, drape it over light fixtures, and weave it around doorframes or the edges of tables. Layering the webbing will give a more authentic and dense look, enhancing the creepy effect.
For railings or larger surfaces, cheesecloth can be torn and frayed to create expansive designs. Stretch it across bannisters or drape it like curtains over windows for a dramatic effect. Outside, stretch spiderweb material over bushes, tree branches, or even porch posts to transform your yard into a spooky haven. To complete the look, scatter plastic spiders or other creepy crawlies onto the webs. You can even add battery-operated spider lights or glowing effects to create a dynamic display.
The versatility of spiderwebs is unmatched—you can use them alone for a minimalist spooky touch or pair them with skeletons, bats, and other decorations for a more elaborate scene. Whether indoors or outdoors, spiderwebs are an easy yet impactful way to set the mood and make your Halloween décor spine-tinglingly eerie.
15. Monster Mouth Apples
Who says Halloween treats can’t be both spooky and healthy? Monster mouth apples are a creative and nutritious addition to your Halloween spread, delighting both kids and adults alike. To create these fun snacks, start by selecting firm and fresh apples in your favorite variety—Granny Smith for a tart flavor or Honeycrisp for a sweet crunch. Begin by slicing the apples into wedges, ensuring they are big enough to hold the decorative “teeth.”
Next, take each apple slice and make shallow, angled cuts to create the appearance of an open mouth. Coat the inside of each “mouth” with peanut butter, almond butter, or any nut-free alternative for a creamy texture. This adhesive layer will also balance the flavors of the apples. To form the “teeth,” press slivers of almonds or sunflower seeds into the peanut butter along the edges of the apple slices. These create the perfect jagged and monstrous appearance.
For a more unsettling twist, drizzle some strawberry jam or raspberry sauce inside the “mouth” for a spooky, blood-like effect. If you want to add more detail, create little eyes on the top of the apple slice using small edible decorations such as candy googly eyes or raisins secured with a dollop of peanut butter. For variety, you can even use different fruits like kiwi slices or add licorice pieces for a tongue.
Monster mouth apples are not only great for parties and gatherings but also make a fantastic activity to involve kids in the kitchen. These treats are easy to assemble, fun to personalize, and a healthier alternative to traditional Halloween candy, ensuring they stand out as a ghoulishly good addition to your celebrations.
16. Floating Witch Hats
Transform your space into an enchanting Halloween wonderland by creating the illusion of floating witch hats. This simple yet striking decoration idea will leave your guests spellbound and add an air of magical mystery to your celebration. To start, gather a variety of witch hats in different styles, sizes, and colors to add dimension and diversity to the display. Traditional black witch hats deliver a classic look, but for a more whimsical or colorful effect, consider hats adorned with glitter, stars, or stripes.
Next, you’ll need transparent fishing line or thin, nearly invisible string to create the "floating" effect. Cut pieces of the fishing line to varying lengths, depending on how high or low you want each hat to hang. Attach one end of the string to the pointy top of each hat using a needle and thread, hot glue, or a strong adhesive tape. The opposite end can be tied to push pins, thumbtacks, or removable adhesive hooks, depending on the type of ceiling or surface you’re working with.
Arrange the hats at staggered heights to give the illusion that they are hovering mid-air, as if controlled by invisible forces. To enhance the effect, position them near an oscillating fan so they gently sway as though enchanted by a witch’s spell. Place them strategically above seating areas, dining tables, or walkways for maximum impact. When paired with dim lighting or flickering candles, the floating witch hats create a mesmerizing, Halloween-inspired atmosphere that will captivate visitors of all ages.
17. Skeleton Hands in Snacks
Bring a spooky twist to your party snacks by serving them in eerie skeleton hands. This creative and creepy touch will elevate any bowl of treats and add Halloween flair to your tablescape. To get started, purchase clear, disposable plastic gloves—these are typically found in kitchen or cleaning supply sections—and ensure they are food-safe if you plan to fill them with edible items. You can also use latex-free gloves for guests with sensitivities.
Begin by carefully filling the gloves with small snacks such as popcorn, jelly beans, candy corn, or mini chocolates. For a dramatic presentation, alternate the types of snacks in each glove to create a variety of textures and colors. Gently push the snacks into the fingers of the glove to ensure they take on the shape of a hand. For an extra creepy effect, consider using red, green, or purple candies instead of traditional colors to mimic monstrous or zombie-like hands.
Once the gloves are filled, tie the open end with a festive ribbon, twine, or small rubber band. To add an extra element of fright, place plastic fingernails or small toy rings on the glove fingers for a spooky touch. Arrange the completed skeleton hands in a large decorative bowl, on trays, or directly on the table as a centerpiece. Not only will these eerie snack holders delight your guests, but they also double as a fun party favor for attendees to take home. This effortless yet imaginative idea will make your Halloween party a memorable and hauntingly good time!
18. DIY Photo Booth
Setting up a Halloween-themed photo booth can be a centerpiece for fun and creativity at your Halloween party. First, choose an area with enough space for guests to pose comfortably; a wall, corner, or designated section of the room works perfectly. Begin by creating a backdrop—this can be as simple or elaborate as you`d like. Use materials like black or orange fabric, spiderweb decorations, strings of fairy lights, or printed Halloween-themed images, such as haunted houses, witches, or pumpkins. You can even include 3D elements like hanging bats or ghosts made from paper or light foam.
Next, assemble an assortment of props to encourage silly or spooky poses. Include items like fake mustaches, oversized glasses, witches` hats, vampire capes, and devil horns. Don`t forget themed signs with playful Halloween phrases like "Trick or Treat," "Boo!" or "Caught in a Web." For an extra homemade touch, you can craft some props using cardboard, paint, and glitter glued to sticks for easy handling.
Set up a small table next to the booth to organize and display the props attractively, and consider adding a mirror so guests can perfect their spooky look. If possible, provide a camera stand or tripod along with a remote shutter so people can take their own pictures. Alternatively, assign a friend or hire a photographer to capture the memories. A photo booth not only livens up the atmosphere but also leaves your guests with lasting mementos of the night.
19. Jar Lanterns
DIY jar lanterns are an excellent way to add eerie, atmospheric lighting to your Halloween décor. Begin by gathering a collection of mason jars or recycled glass containers in various sizes. Clean the jars thoroughly to ensure smooth adhesion for your decorations. Decide on the design you want for each jar, such as spooky faces, bats, ghosts, spiders, or even intricate haunted scenes.
To create your jars, you can paint directly onto the surface using acrylic paint or glass-specific paints. Popular techniques include painting the jar black and etching a design for light to shine through or using vibrant orange, green, or purple for festive Halloween hues. For a translucent, stained-glass effect, mix clear glue with food coloring and paint it onto the jar. Allow the paint to dry fully before proceeding.
Once the jars are painted and decorated, place a small tea light or battery-operated LED candle inside. Battery-operated lights are a safer option, especially if children or pets are present. Arrange the illuminated jars around your space—on windowsills, stairs, tabletops, or even hanging them from hooks or tree branches using twine or wire. For added drama, line a walkway with the jar lanterns to guide your guests to the party. The glow of these lanterns will create a hauntingly magical ambiance, turning your home into a festive and spooky haven.
20. Paper Plate Masks
Creating paper plate masks is a fun and creative activity that both children and adults can enjoy. Start by gathering plain white paper plates, scissors, and markers or paint. Begin by cutting out two eye holes on each plate, ensuring they are positioned and sized appropriately for the wearer’s face. From there, you can transform the plain plate into a variety of characters. Decorate them as monsters with jagged teeth and glowing eyes using paint or stickers, or create animals by attaching handmade ears, whiskers, and colorful patterns.
For famous characters, use printed templates or look for online tutorials to achieve more intricate designs. To finish, punch small holes on either side of the plate and attach elastic bands or string to secure the mask comfortably on the face. These masks not only make for delightful costume accessories but also double as personalized party crafts that guests can take home as keepsakes.
21. Balloon Ghosts
Balloon ghosts are a quick and inexpensive way to add a spooky yet playful vibe to any party area. To start, gather white balloons, a black marker or stickers, and some string or ribbon. Blow up the white balloons to their desired size, but avoid over-inflating as it makes them easier to hang. Next, use the black marker to draw ghostly faces on the balloons — try experimenting with different expressions to create a variety of ghost moods, from friendly to spooky. Another option is to use adhesive black paper or pre-cut stickers for precision when making eyes and mouths. Then, attach a piece of string or ribbon to the tied end of each balloon. Finally, hang the balloons from ceilings, doorways, or trees for an eerie floating effect. Add extra ambiance by positioning the ghost balloons near dim lighting or pairing them with cobwebs and fairy lights for a chilling touch.
22. Candy Corn Vases
Candy corn vases are an effortless way to combine delightful décor and sweet treats into a festive centerpiece. Begin by choosing clear glass vases or jars of various shapes and sizes. Clean and dry the vases thoroughly to ensure they showcase the candy corn in all its vibrant glory. Layer the candy inside the vases in three distinctive sections — start with a layer of yellow candies at the bottom, followed by a bright orange layer in the middle, and finish with white candies at the top to mimic the iconic candy corn design. For added texture and height, consider placing artificial flowers, fall leaves, or twigs inside the vases. Alternatively, the candy vases can stand alone as eye-catching pieces or be grouped together at the center of a table. Not only do they serve as a visually appealing decoration, but the candy can also double as a treat for guests to enjoy during the celebration.
23. Scary Story Contest
Hosting a scary story contest is a perfect way to combine creativity with the spooky spirit of Halloween. To set the scene, dim the lights in a room or turn them off completely, and rely on flashlights to create an eerie, flickering glow. Arrange seating in a circle or semi-circle to establish an intimate environment where participants can feel connected and engaged. Provide props, such as blankets for added comfort or fake cobwebs and pumpkins for ambiance.
Encourage participants to bring their own scary stories, which could be original creations or retellings of classic ghost tales. For those who may be reluctant to prepare in advance, offer story prompts like “What lies in the old abandoned mansion?” or “The lights went out… then I heard footsteps.” Make sure to allocate a specific time limit for each story to keep the momentum of the activity going and to ensure everyone gets a turn.
To add a fun competitive twist, appoint a panel of judges or have everyone anonymously vote for categories such as “Most Spine-Chilling,” “Most Creative Plot,” or “Best Delivery.” Prizes could range from Halloween-themed trinkets to homemade treats like cookies or caramel apples. The thrill of sharing eerie stories coupled with the dim atmosphere creates an unforgettable experience for guests of all ages.
24. Halloween Scavenger Hunt
A Halloween scavenger hunt is an engaging and interactive activity that blends exploration with holiday festivities. Begin by selecting whether to hold the hunt indoors, outdoors, or a combination of both. Decorate the chosen area with spooky elements such as fake tombstones, skeletons, spider webs, and glowing jack-o’-lanterns to immerse participants in the Halloween atmosphere.
The hunt itself involves hiding small treats, spooky trinkets, or themed items around the space. These could include miniature chocolate bars, plastic spiders, glow-in-the-dark ghosts, or even small clues for multi-step challenges. Print and distribute a check-list or set of riddles and clues that participants can use to identify what they need to find. For example, you could write “Find the skeleton guarding the front porch” or “Locate the candy hidden beneath the witch’s hat.”
To make the activity more exciting, design the scavenger hunt with progressive levels of difficulty. The first items might be easy to locate, while later rounds could require solving puzzles or riddles to identify hiding spots. For a more competitive version, divide participants into teams and see which group can complete the hunt first. Alternatively, maintain a leisurely pace if you want younger participants to enjoy at their own speed.
End the activity with a reward station, where participants can trade completed check-lists for prizes like themed stickers, candy bags, or small toys. A Halloween scavenger hunt is not only fun but also fosters teamwork, problem-solving, and creativity, making it an ideal holiday activity for guests of all ages.
25. Repurposed Halloween Costumes
One of the most creative and budget-friendly ways to celebrate Halloween is by repurposing old clothes into imaginative costumes. This approach not only saves money but also allows for a personal touch, making each costume entirely unique. With a little creativity and some basic crafting supplies, you can transform everyday wardrobe items into fun and spooky ensembles with minimal effort.
For a scarecrow costume, gather old jeans, a flannel shirt, and a straw hat—items that might already be lying around your home or can be easily sourced from a thrift store. To add extra flair, tuck a bit of hay or raffia into the cuffs of the shirt and pants to simulate straw, and smear some makeup or face paint for a rustic, weathered look. You can even sew or glue on fabric patches to give the outfit a farm-inspired vibe.
If you`d rather sport a zombie costume, ragged or slightly worn-out clothes are perfect for achieving the undead aesthetic. Tear or cut small holes in an old shirt and pants, then stain the fabric with coffee or tea for a dark, aged effect. Use face paint or makeup to create pale, sunken skin with dark circles around the eyes. A touch of red lipstick or fake blood can make wounds or scratches for added authenticity. The beauty of a zombie costume lies in its imperfection—embrace the ragged and eerie.
For a classic vampire look, a simple black outfit can lay the foundation. Pair black slacks or a dress with a dark shirt or cape, and accessorize with items like a high-collared jacket or a red scarf to evoke an aristocratic, gothic style. You can slick your hair back with gel for a polished appearance and add some pale makeup, along with dark lipstick and false fangs, to complete the transformation. A homemade medallion can elevate the costume into a sophisticated Dracula-inspired ensemble.
These repurposed costume ideas not only reduce waste by reusing items you already own but also encourage innovation and personalization. The possibilities are nearly endless—old bedsheets can double as ghost costumes, while worn-out athletic gear can become the base for a zombie athlete or a DIY superhero. Crafting your costume can also become a group activity for friends and family, bringing people together to brainstorm and create.
Conclusion
With these budget-friendly ideas, Halloween can be fun, creative, and affordable for everyone. Whether you’re hosting a party, decorating your home, or simply looking for unique ways to dress up, repurposing old clothing into costumes makes the holiday accessible and engaging. By combining resourcefulness and imagination, you can celebrate Halloween in ways that not only save money but also foster a deeper sense of creativity and joy. There’s no need to break the bank when there are so many simple and sustainable ways to make this spooky season memorable!
Frequently Asked Questions (FAQs)
How can I make Halloween decorations without spending much?
You can create stunning Halloween decorations by repurposing items from around your home. Use paper to cut out silhouettes of bats, ghosts, and pumpkins, and tape them to walls or windows. Cardboard boxes can be painted or cut into tombstones, creating a creepy graveyard effect. Old sheets can transform into floating ghost decorations by draping them over balloons or hangers. Additionally, try crafting spiderwebs using cotton balls or string for a classic Halloween touch. These DIY options are cost-effective, environmentally friendly, and allow your creativity to shine.
Where can I find cheap Halloween costumes?
Look no further than thrift stores, dollar stores, or your own closet when searching for budget-friendly Halloween costumes. Many thrift stores stock inexpensive costumes or clothing items that can be transformed into creative outfits. Dollar stores often have affordable costume accessories like masks, hats, or capes to complete your look. Alternatively, try making a DIY costume using clothes you already own. For instance, an all-black outfit paired with some DIY cat ears can turn you into a cat, or an old plaid shirt can inspire a scarecrow ensemble.
What are some easy last-minute Halloween ideas?
If you’re short on time, you can rely on simple and quick Halloween ideas using materials you already have. Paper plates can be turned into masks with drawings or cutouts, paired with elastic bands for wearing. Wrapping a person in toilet paper creates an instant mummy costume. For decorations, glow sticks can be placed inside empty jars to create eerie lighting or used as a fun alternative to candles for illuminating pumpkins. These ideas are ideal for those who need a fast, low-cost way to participate in Halloween festivities.
How can I make Halloween treats without baking?
Skip the oven by transforming pre-packaged snacks into spooky Halloween treats. For example, you can create monster mouth apple slices by spreading peanut butter on apple wedges and adding candy eyes and pretzel sticks for teeth. Skeleton hand popcorn bags are another fun option—simply fill plastic gloves with popcorn, tying them shut for a creepy snack. Chocolate-covered pretzels can be made quickly by dipping pretzel sticks in melted chocolate and decorating them with candy sprinkles or icing. These creative treats are perfect for last-minute Halloween parties.
What’s the best way to light up Halloween decor on a budget?
Lighting is essential for setting a spooky mood, and it can be done without breaking the bank. LED tea lights are inexpensive, reusable, and safe for both indoor and outdoor use. Colored light bulbs in orange, green, or purple can easily enhance the Halloween atmosphere with a dramatic effect. Glow sticks are versatile and affordable—place them inside jars, pumpkins, or balloons to create glowing accents. These lighting solutions provide a fun and eerie ambiance while staying within budget.